


How to hold the rapier


***All of the quotes from the Vienna Anonymous manuscript in this issue are from Tom Leoni’s translation.
How a historical fencer should hold their sword is a particular point of interest for a few instructors I know, and you won’t be shocked to learn that I have my thoughts on the subject as well.
Matt Easton produced a video that is mainly geared toward how to orient your hand in the types of hilts found on rapiers. He recognizes in his video that there were different ways to hold the rapier in different sword systems, and that really there’s no one right way to do it, but there are some incorrect ways.
Guy Windsor goes into some detail about how, in his view, there are some biomechanical considerations that come into play when you’re using a sword.
Effectively, holding your sword incorrectly can tire your hand and arm out quickly and possibly lead to injury because, as Guy points out well, your small stabilizer muscles are doing more work than they evolved for. He writes:
In essence, your grip strength and wrist stabilisation strength should be acting as back-up systems only: the sword should stay in your hand with almost no strength being used at all, and when you strike, the force coming back from the target should be routed through the bones of your hands and wrist, and thence through your body to the ground, with no need to tighten up on impact at all.1
So below is an excerpt from my manual that goes into graphic detail (see what I did there?) on how I teach students to hold their rapier2 for this northern Italian system. My approach is drawn from my decades of using the rapier in this system, as well as what I could glean from the manuals in question.
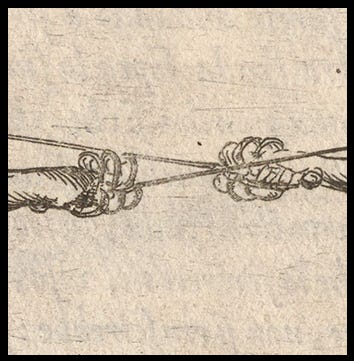
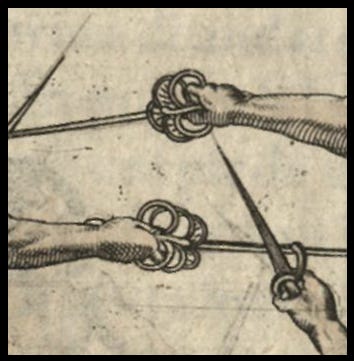
The authors of the manuals I’m focusing on didn’t go into any written detail about how to hold the sword, except to say “Do not hold your sword too tightly…”,3 but their illustrations can be useful since, in theory, the plates were etched from live models.4

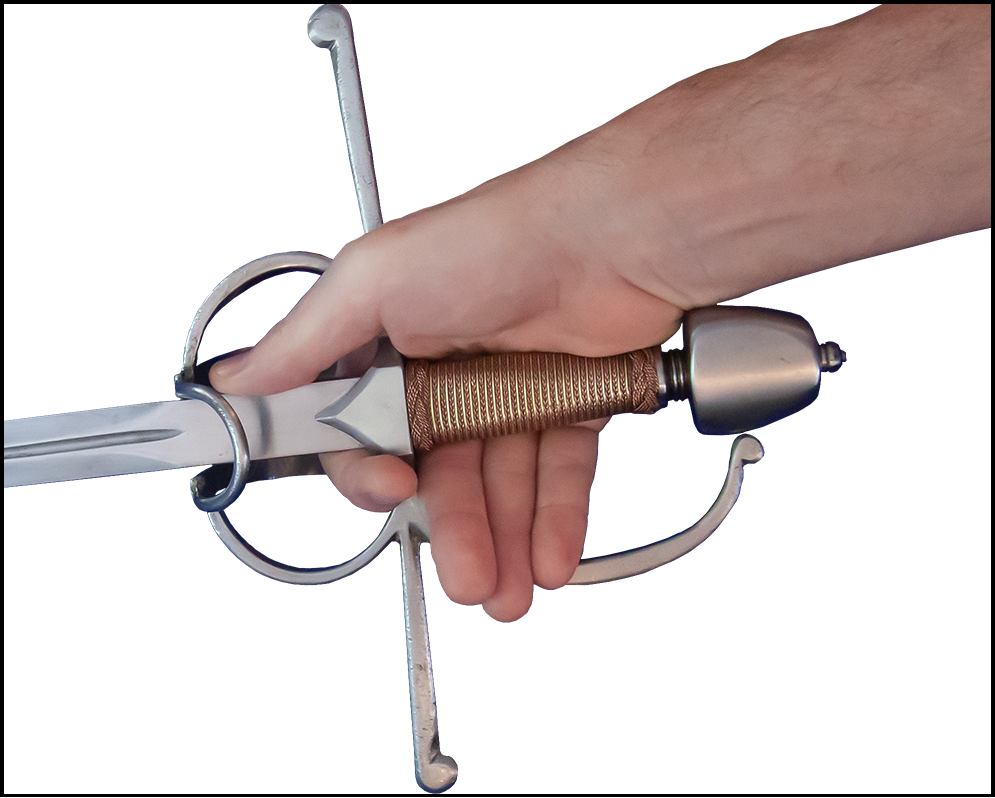
1) Extend your hand into the hilt like you are reaching for a hand- shake. If your sword has a knuckle bow, then that will be wrapping around your knuckles. So reach into the sword with your fingers extending down toward the knuckle bow, as you see in the images. If your sword does not have a knuckle bow, but it has a ring or rings extending out on one side of the hilt, then reach into the hilt so that those rings will protect the back of your hand.

2) Wrap your forefinger around the lower quillon5 and the ricasso,6 and your other fingers around the handle. (Some may prefer two fingers around the lower quillon and ricasso, but note below where I describe where the pommel should rest.)
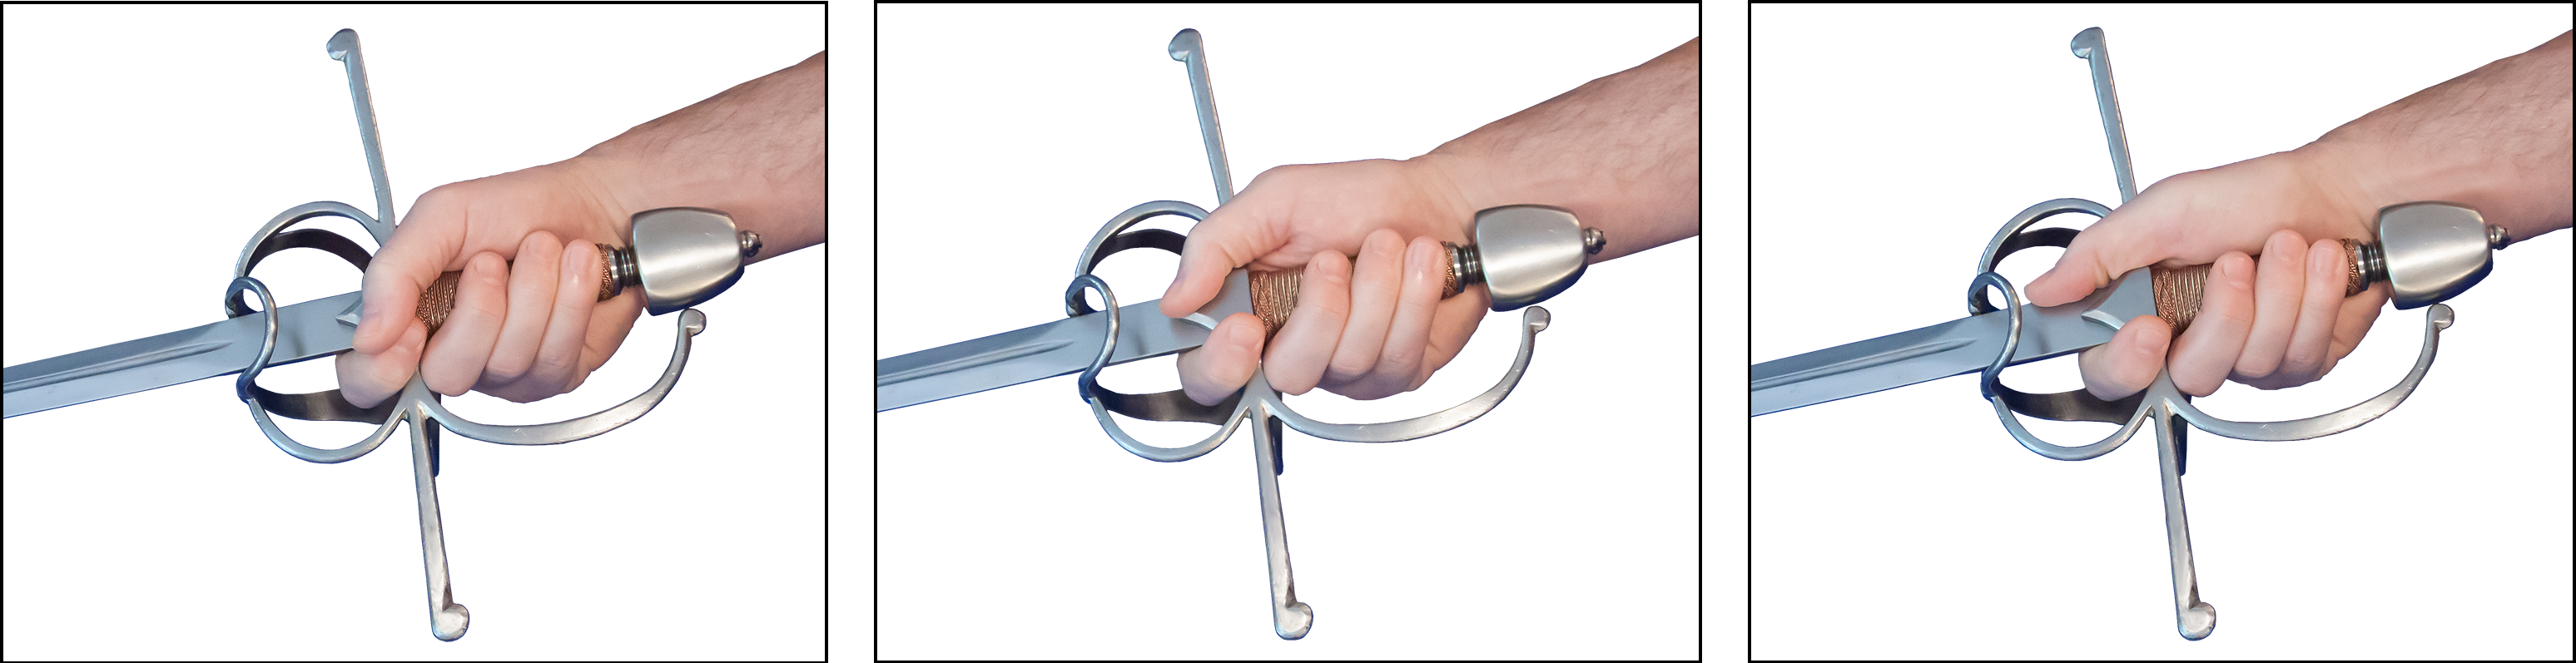
3) Place your thumb either against your forefinger, along the quillon block, or along the ricasso. Note that the pommel7 meets the handle just at the place where the hand meets the wrist. The place where the pommel flares rests at the edge of the hand. The bulk of the pommel rests against the wrist (see details below from Capoferro’s, Giganti’s, and Fabris’ manuals). This aids in matching the line of your sword to the line of your forearm, such that your sword and forearm form one straight line from tip to elbow. Note also - if you do choose to wrap two fingers around the ricasso, this will naturally create a slight angle to your sword, so you won’t easily achieve a straight line from elbow to point.


4) The main contact points of the ricasso should be against the second joint of your forefinger and the handle should contact along the base, or meat, of your thumb (see also the images below from the manuals). Your fingers on the handle are generally used to make fine adjustments and to convey information from your sword to you. They shouldn’t be clamping down in a tight grip.


5) You should be able to release and wiggle your pinky, ring finger, and middle fingertips while still maintaining usable control of the sword.
6) As I use my sword I will sometimes shift into a variation of the grip, with the handle against the base or edge of the hand. This is usually when I throw cuts, or want to hold the sword at an angle from the line made by my forearm. Below is a detail from Capoferro’s manual that illustrates both the inline (handle along the meat of the thumb) and the angled (pommel against the edge of the hand) sword grips in one figure.

I hope this short lesson is helpful. It’s not an exact science, but play around with holding the sword in the ways I’ve described above, and try to find the place where the mechanics of your hand and arm are working to support your sword efficiently and not leaving your arm sore or fatigued.
Also, if your handle is too long and your pommel cannot rest where I’ve described, I recommend shortening the handle until it does. You want your sword to work with you, not against you. It’s worth noting that a 4 inch long handle was considered long. A rough estimate is that the average rapier handle in the late 16th, early 17th centuries C.E. was around 3.5 inches.8 I plan to write an issue of this newsletter in the coming months that goes into more detail about how to make your rapier work for you and not against you.
Next up:
Northern Italian Postures, Part 2: The postures of Salvatore Fabris - continued (Paid subscribers)
A status report on my fencing manual, with some test images (All subscribers)
Windsor, Guy. 2022. “You’re Probably Holding Your Sword Wrong. Here’s Why. - Guy Windsor.” Guywindsor.net. February 20, 2022. https://guywindsor.net/2022/02/youre-probably-holding-your-sword-wrong-heres-why/.
Refer back to my earlier post - What is a rapier, anyway? - if you want to know what I mean by ‘rapier’
Leoni, Tom. 2019. Vienna Anonymous on Fencing: A Rapier Masterclass from the 17th Century. Page 44. Lulu.com.
Note that I generally do not recommend relying solely on the illustrations in these manuals for clarity on what they were teaching. The text is usually the best source of the information with the illustrations playing a supporting role.
The quillons are the bars or arms extending at right angles to the blade, placed between the blade and the handle. They can be straight or bent forward, back, or sideways. Sometimes called the “cross-guard.”
The part of the blade that disappears into the quillon block, and is protected by the hilt, is the ricasso. This is the part of the blade you will wrap your finger around when holding the rapier.
The pommel is the enlarged fitting at the end of the handle. Rapier pommels are generally used as an often decorative counterweight to help achieve the desired dynamics of the sword.
This is according to Craig Johnson of Arms and Armor, who has handled and measured more extant rapiers than anyone else I can possibly imagine.
Fantastic article. I learned this lesson the hard way, getting a bad case of tennis elbow from fencing. Then someone finally taught me how to hold the sword right - exactly as you show. Now, it's one of the very first things I teach new fencers.
Really enjoyed this. I like your use of the manuscript details especially, and the photos you've taken are clear and explanatory which is always tricky.
The transition between grips for different actions is often overlooked in modern
"historical fencing" teaching, it's nice to see it being raised here. I look forward to the next instalments!